Be My Berry Pie

Well hello!  It’s been quite a while since I’ve visited this little space and I have been missing it.  I’m writing from a new venue today, one that I couldn’t be more pleased about.  I bought my very first house in May and my world since then has been consumed with trips to Home Depot (Lord, how can I loathe a place so much?), and ungodly amount of Benjamin Moore’s White Dove paint, and boxes.  So many boxes.  But here I am, enjoying our mostly unorganized/empty rooms (moving from a small 1-bedroom apartment to a house instantly solved our clutter problem!) and our kitchen, which happens to be about 5 times the size of our last one.  And after weeks of eating nothing but take-out and pastries from the coffee shop, I’m ready again for some good home cookin’.

I started small and simple to get acquainted with the new kitchen layout and appliances.  Jeremy and I have been rediscovering the pleasures of freshly made fried eggs and toast, lemon pasta, BLT’s, and sourdough pancakes.  But over the weekend, I decided to tackle something a little more ambitious.  My very first berry pie.
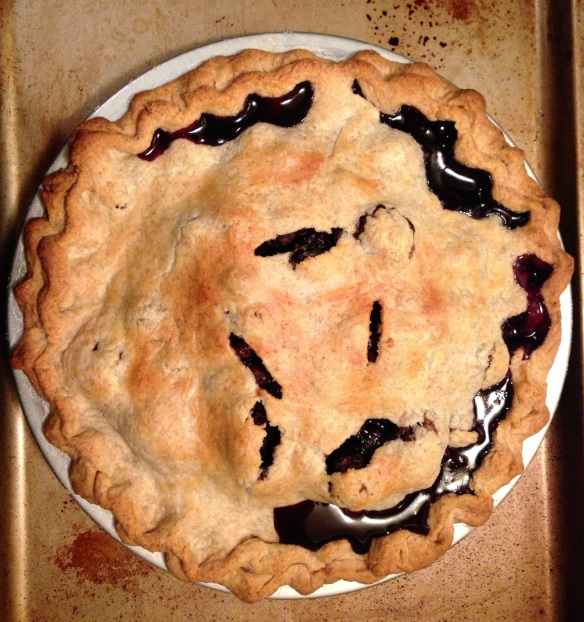
IMG_0226And while you’ll have to excuse my rusty camera skills and my even more rusty remember-to-take-some-damn-photos-before-obliterating-the-thing skills, I was justifiably happy with this pie.  The recipe is ever so slightly adapted from Heidi’s version and that girl must know her pies if she can calmly talk me through my first double-crust venture.  If you’ve been waiting for the right moment to tackle this sort of culinary accomplishment, try now.  

Last year: Goji Berry Power Bars

A Berry Pie

Start with 101 Cookbook’s Flakey Rye Crust here.  I used the food processor technique and it came out just fine.  While the crust is chilling in the fridge, mix the filling ingredients and preheat the oven to 425F.

Filling:
2/3 cup brown sugar
1/3 cup all-purpose flour
1/4 tsp sea salt
1/2 tsp cinnamon
18 oz blueberries
8 oz blackberries

Roll out the crust to fit your pie pan (this video is very helpful).  Place the bottom crust in the pan and fold over the edges, pinching a little to make it pretty.  Fill with berry mixture and top with second crust.  Cut off excess crust, leaving about a cm extra to fold and pinch with the bottom layer.  Cut steam vents into the crust and brush with milk or cream.

Now into the oven for 35-45 minutes (mine went for the full 45) until the crust is golden brown.  Let it cool before diving in!
Related Links I Love:
Strawberry Rhubarb Crumb Pie from 100 Dollars a Month
Cherry Rose Pie from The Kitchy Kitchen
Lemon Blueberry Ice Cream Sandwiches from Shutterbean

Fresh Blueberries with Honey-Ricotta Cream

Today I am going to share the simplest, dreamiest summer dessert with you.  It’s got a short ingredients list, won’t heat up your kitchen, and will take you all of 5 minutes to put together.  Sound good?

Behold: incredibly smooth honey-ricotta cream draped over seasonal blueberries.  You may use any other type of fruit that strikes your fancy.  A mix of berries or peaches would be perfect.  You can also dress it up in a variety of ways.  Consider adding lemon zest or vanilla paste to the ricotta.  Or sprinkle a few lavender flowers over your dessert bowls.  Personally, I’ve been enjoying as is for a cooling summer treat.

Fresh Blueberries with Honey-Ricotta Cream
makes 8 servings
adapted from Bon Appetit

Ingredients
– 16 oz ricotta cheese
– 1/4 cup sour cream
– 1/4 cup raw honey
– 3 cups fresh blueberries

Place ricotta, sour cream, and honey in the blender.  Blend until smooth and refrigerate for at least 2 hours.  This can be made up to 2 days ahead of time.

Place a few tablespoons of the cream in the bottom of your dessert bowls.  Top with a generous handful of blueberries and another dollop of cream.  Serve while still cold.

I shared this post with this week’s Full Plate ThursdayMonday ManiaMelt in Your Mouth MondayMy Meatless Monday and Mix it Up Monday.

Peanut Butter White Bean Blondies

If you’ve read this blog before, you might know that I like to try to sneak healthy ingredients into my meals in unexpected ways.  I’m always happy throwing some spinach into a smoothie or having turmeric with breakfast.  Which is why I was thrilled to find Chocolate Covered Katie’s incredible recipe for Peanut Butter White Bean Blondies.

Instead of using flour, the batter is based in white beans…but you really couldn’t guess it based on the taste and texture.  In fact, I’m thinking we might want to change the name to “Dense, Gooey Pieces of Peanut Butter Heaven”.  Who’s with me?  And while you’re enjoying your decadent treat, you can feel smug about all the protein and fiber you’re eating.

Perfect for a Fourth of July picnic.  Or for my inevitable anxiety snacking as I begin my final term of nursing school with a night shift clinical rotation and impending licensure exam and job hunt.  What?  Oh I’m fine.  Just fine.  (Eats another blondie.)

Does anyone else have big plans on the horizon for the summer?

Peanut Butter White Bean Blondies
makes 1 8×8 pan
from Chocolate Covered Katie’s recipe

Note: I didn’t really make any changes from the original recipe, but katie lists a few options for how to make these.  This is the version I used.  Check out her original recipe for substitution ideas!

Ingredients
– 1 1/2 cups white beans
– 3/4 tsp baking powder
– 1/8 tsp baking soda
– 1/4 tsp salt
– 3/4 cup coconut sugar
– 2 tsp vanilla extract
– 1/4 cup ground flax seeds
– 1/4 cup natural peanut butter
– 1/2 cup dark chocolate chips

Preheat oven to 350 F.

Blend all ingredients except for chocolate chips in a food processor until very smooth, scraping down the sides as needed.  Fold chocolate chips into batter and pour into an 8×8 inch baking dish.

Bake for 25-30 minutes.  Allow to cool and enjoy.

* I added this post to this week’s Fresh Bites Friday, Fight Back FridayPennywise PlatterFull Plate Thursday, and Wellness Weekend.

Peanut Butter Oat Clusters (GF, Vegan)

It was the perfect day for a potluck picnic and I decided to bring something wholesome but with an edge of sweetness.  That’s how these chocolate-studded bite-sized peanut butter clusters came to be.  By the end of the picnic, they were all gone.

Oh, and just because the dough contains some healthy ingredients, try not to ruin your dinner by standing over the mixing bowl and eating it by the handful.  Do as I say, not as I do.  🙂

Peanut Butter Oat Clusters
makes 40-50

Ingredients
– 3 1/4 cup oats
– 3/4 cups brown rice flour
– 1 tsp baking powder
– 2 Tbsp ground flax seeds
– 1/3 cup coconut oil
– 1 cup peanut butter
– 1/2 cup brown sugar
– 1 tsp vanilla

Preheat oven to 350F.

In a large bowl, mix oats, brown rice flour, baking powder, and flax seeds together.

Melt the coconut oil in a medium bowl in the microwave.  Add peanut butter and use a fork to mix until smooth.  Add brown sugar and vanilla and mix until well-combined.

Add wet ingredients to dry ingredients and mix well.  Fold in chocolate chips.  Using a Tablespoon, drop dough onto a greased or parchment paper-lined baking sheet.  They do not really spread out while baking and so you can put them quite close together.  Bake for 12-15 minutes, until just starting to brown.  They will firm up as they cool.

* I added this post to this week’s Seasonal Celebration Sunday, Melt in Your Mouth Monday, Mix it Up Monday, Monday Mania, and My Meatless Mondays.

Raw Strawberry Thumbprint Cookies

With any luck, this is the last sweet treat that you will see here for the next 3 weeks.  In response to the approach of summer and the slight but constant bloat in my belly, I’ve decided to jump into a 21 day sugar detox.  This is not a well-planned or well-researched detox.  Some more seasoned and hardcore detoxers might even call it a “detox lite” because it’s not as strict as it could be.  Nonetheless, I decided that doing something that feels possible for me for 21 days is better than doing nothing.

My version of the sugar detox goes like this:

Not OK: sugar, honey, maple syrup, agave nectar, brown rice syrup (or any products containing these…bye Clif bars!), white or refined flour, fruit juices

OK: pretty much everything else, including whole fruit

I’m going to focus on eating vegetables, fish, eggs, and healthy fats like olive and coconut oil.  These won’t be all that I eat, but I just stocked my refrigerator and pantry with exciting personal detox-approved items including broccoli, asparagus, spinach, cucumbers avocados, bananas, lemons, olives, wild-caught salmon, Oregon bay shrimp, and sardines packed in olive oil.  And some Mary’s Gone Crackers crackers.

In the meantime, these healthy (but brown rice syrup containing) cookies are going in the freezer.  They’ll be waiting for me 21 20 days from now.

Raw Strawberry Thumbprint Cookies
makes 30 cookies
adapted from Rawmazing’s recipe

Ingredients
– 2 cups almonds, soaked and dehydrated if possible
– 1/2 cup unsweetened dried coconut, pulverized in the blender
– 1/4 cup chia seeds
– pinch of salt
– 1/3 cup brown rice syrup
– 1/3 cup peanut oil (I think I’d like to try coconut oil next time)
– 1/4 cup fresh strawberries

First, make the filling.  Put the strawberries in a blender or food processor and puree.  That’s it.  Set aside.

Place almonds in the food processor and pulse until finely ground.  This could take several minutes.

Add coconut and chia seeds.  Pulse to combine.  Add brown rice syrup and oil and pulse until the mixture resembles a coarse, wet sand.

Using a tablespoon measure, form the dough into small balls.  Press a hole in the center and fill with strawberry puree.

Dehydrate and 115 degrees for 8 hours.

* I shared this post on this week’s Fat Tuesday, Traditional Tuesday, Hearth and Soul Hop, Whole Food Wednesday, Real Food Wednesday, Gluten-Free Wednesday, and Tasty Tuesday.

Mango, Coconut, and Lime Pudding

Has anyone else struggled with trying to find the “right” diet?  I don’t mean diet in the weight loss sense; I mean just trying to make smart choices about what to put into one’s body 3 (or 4, or 5, or, oh heck, 6) times a day.  I’m not sure where my intense fascination with nutrition came from, but I’m sure it somehow stems from my feelings about food in general.  But things can get dangerous when you pair a mildly obsessive personality with the internet and an endlessly contentious topic of debate.  I can’t say I’m proud of how much time I’ve spent researching dietary advice…reading everything from books by experts in the field (often with opposing viewpoints!) to magazines and blogs.  Couldn’t I have been doing something more productive?  Then again, I’ve mostly enjoyed my research, though I’m not going to pretend that I have any final conclusions to share.

I’ve been convinced (and re-convinced) that a multitude of diets are right.  This is not to say I’ve really put any of them into practice.  I usually just spend a lot of time reading why I should be eating a certain way and then stick with the plan until something that looks tastier (hello grilled cheese?) comes along.  I’ve found myself delving into the depths of the vegan (I dated a vegan for a little while), raw vegan, nutritarian, paleo/primal, and the oh-what-the-heck-I-give-up diets.  I’m sure I’m missing some in that list.

While most of the time I spent obsessively learning about these different diets was probably wasted, I can at least say that I’ve learned some kitchen techniques that I wouldn’t have encountered otherwise.  Which leads me to today’s recipe…a raw, vegan, and oh-so-simple dessert that will have your tastebuds singing.  A good blender or food processor will yield the creamiest, most decadent texture and it becomes even thicker (and I think better) after spending some time chilling in the refrigerator.  Whether you chill it or not, this is a wonderful dessert for the warmer weather ahead of us.

Please share: Does my weird, endless dietary research strike a chord with anyone out there?  Are you set on one philosophy or do you cherry-pick, like me?

Mango, Coconut, and Lime Pudding
makes 2 servings
adapted from Raw Food Home Recipes

Ingredients
–  1/2 cup cashews, soaked at least 2 hours or overnight
– 1 ripe mango, flesh cut from the skin and pit
– juice of 1 lime
– 1 Tbsp coconut oil

Place all ingredients in a high-speed blender and puree until perfectly smooth.  Serve immediately or chill.

Store in an airtight container in the refrigerator for up to 2 days.

*I added this post to this week’s Whole Foods Wednesday, Real Food Wednesday, Gluten-Free Wednesday, and Frugal Days, Sustainable Ways.

Chocolate Brownie Cake and a Birthday

Having visitors from out of town always reminds me of how much our culture revolves around food and beverages here in Portland.  My list of things to do with an out-of-towner is skewed heavily toward the restaurants, bars, and breweries with just a few other attractions (Powell’s books, neighborhood shopping) sprinkled in.  And so I’m still recovering from my sister’s recent visit.  It was an especially exciting visit for me because it landed just a day after her birthday and, since we live in different states, we rarely get to spend birthdays together.  It also gave me an excuse to bake a birthday cake.

This recipe is about as simple as you can get.  It was adapted by Jacqui at So Good and Tasty from a David Lebovitz recipe.  It doesn’t call for any frosting, but good-quality ice cream is a great way to add a little extra sweetness and creaminess.  I’ve been snacking on it for a few days now and I think it’s definitely best when served warm.  Real ingredients, not too sweet…this is cake all grown up.  Happy birthday, Maggie!

Simple Chocolate Cake
adapted from So Good and Tasty

Ingredients
– 8 oz semisweet chocolate, roughly chopped
– 8 Tbsp unsalted butter
– 1/3 cup sugar
– 4 eggs at room temperature, yolks separated from whites
– 2 Tbsp all-purpose flour
– pinch of salt

Preheat the oven to 350F and butter an 8-inch cake pan.

Melt the chocolate and butter in a double broiler until smooth.  Remove from heat and add half of the sugar, the eggs yolks, and the flour.

Using a hand- or stand-mixer, whip the egg yolks with the salt for a few minutes, until they begin to appear a bit foamy.  Slowly add the remaining sugar in small amounts, whipping constantly until the mixture forms peaks that hold their shape.  (I bought an electric hand-mixer just for this and I really would recommend it…I’m not sure I would have had the speed or stamina to do it by hand!)

Using a rubber spatula, fold the egg whites in with the chocolate batter until the mixture is uniform.  This will take several minutes but you will get there.

Scrape the batter into the pan and bake for 25-30 minutes, until the center feels firm.  Let cool and serve with good-quality vanilla ice cream.
* I added this post to this week’s Melt in Your Mouth Monday.

S’mores Banana Ice Cream

Have you ever tried the trick of making ice cream out of frozen bananas?  I’ve got to admit that it’s a pretty good one.  You take a frozen banana and pulverize the heck out if it in the food processor.  You end up with a sweet bowl of soft-serve-like consistency “ice cream” that you can feel pretty virtuous about as you eat it.  Still, I can’t pretend it’s a perfect stand-in for the real thing.  I mean, my tastebuds are just never going to believe that a banana = cream + sugar.  There is just no way.  And so after my first few shots at making banana ice cream, I decided that it wasn’t going to cut it.  Sure, it’s a great party trick (depending on the kinds of parties you go to?) but it’s not going to stop me from wanting the real thing.

Recently, though, I was inspired to give it another try when I (re)discovered a fantastic idea that was posted on The Wannabe Chef’s website last summer.  S’mores Banana Ice Cream.  Bingo.  The “ice cream” portion is made of banana and cocoa powder and it provides a lovely base for the real stars of the show, lightly toasted marshmallows and graham crackers.  I loved it.  I’m playing around with the idea of introducing some fat into the equation by blending coconut oil into the ice cream.  I haven’t tried it yet but I have a hunch that it could be what many banana soft serve recipes are missing.

Has anyone else found an incredible flavor combination to use with this technique?  If so, I’d love to hear about it!

S’mores Banana Ice Cream
serves 1

Ingredients
– 1 frozen banana
– 1 Tbsp unsweetened cocoa powder
– 1 Tbsp milk of choice (I used coconut)
– a handful of marshmallows
– graham crackers
– Optional: You could add a sweetener such as maple syrup or agave, especially if your banana was not incredibly ripe when you froze it.

In a food processor, pulse the banana, cocoa powder, and milk together (and sweetener, if using) until smooth.  You may need to scrape down the sides a few times.  Scoop into a bowl and set aside.

Broil marshmallows in the oven for just a few minutes, until soft and golden.  Sprinkle on top of the ice cream and garnish with a graham cracker square.

Coconut Bars (Grain Free)

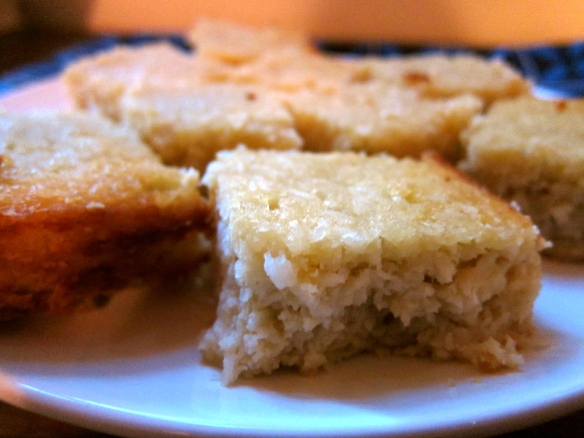
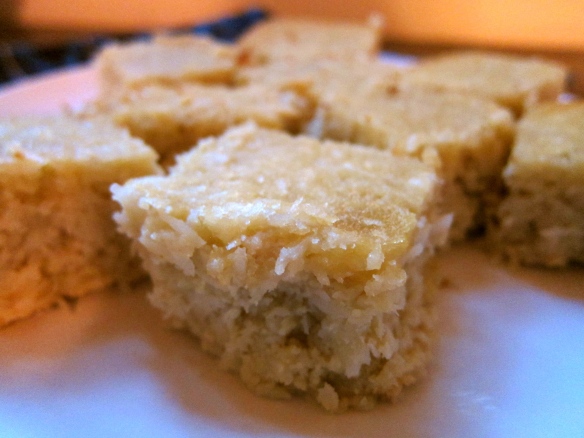
Hi there!  I think it’s about time I posted a treat on here.  We’ve finally finished up the last of the holiday goodies that were lingering in our freezer and I’m ready to head into the brave new world of baking for 2012.  These coconut bars were just the thing to get me started.  They’re dense and rich with the perfect amount of sweetness, but the ingredients list is somewhat virtuous.  At least it’s virtuous is you’re like me and believe that coconut fat isn’t really fat…it’s a superfood.  Yes, I did eat 2 for breakfast yesterday.  And 2 more as a post-workout snack today.

They have the boyfriend’s stamp of approval, too.  Or at least I assume they do because I left the pan unattended with Jeremy and his friend for a few hours yesterday and when I got home, half of the bars were gone.

Please enjoy!  I’m off to get my clinical prep done before my earrrrrrly morning at the hospital tomorrow.

Coconut Bars
makes 16
adapted (just slightly) from Elana’s Pantry

Ingredients
– 3 eggs
– 1 cup unsweetened coconut milk beverage (I realized later that the original recipe is referring to the thick coconut milk that you get in a can.  You can choose your own calorie adventure here.)
– 1/3 cup coconut oil, melted
– 1/3 cup honey
– 1 Tbs vanilla extract
– 1/2 cup almond flour
– 2 Tbs coconut flour
– 1 1/2 cups unsweetened shredded coconut
– 1/4 tsp sea salt

1. Preheat oven to 350.  In a large bowl, mix eggs, coconut milk, coconut oil, honey, and vanilla.  The mixture may want to separate, just do your best.

2. Add almond flour, coconut flour, shredded coconut, and salt.  Mix well.

3. Pour the batter into an 8×8 and bake for 30 minutes.  Allow to cool and serve.

* I added this post to this week’s Hearth and Soul Hop, Whole Foods Wednesdays, Real Food Wednesday, These Chicks CookedGluten-Free WednesdayTraditional TuesdayFat Tuesday, Superfood Sunday, and Slightly Indulgent Tuesday.

Apple and Almond Cake

This cake is amazingly decadent but nicely balanced with the sweet-tart apples.  If you don’t like butter, don’t eat it.  Or if you’re watching your calories you can do like I did: skip dinner and have this instead.  🙂  You’ll want to have some apples that will hold their shape a little when baked.  La Domestique has a good synopsis of some common varieties you’ll find in the grocery store this time of year.

Apple and Almond Cake
(Adapted from the recipe in River Cottage Every Day)
Serves 8

Ingredients
For the apples
3 apples (I used 2 Jonagold and 1 Gala)
– 2 Tbs butter
– 1 heaping Tbs granulated sugar
For the cake
1/2 cup all-purpose flour
scant tsp baking powder
1/2 cup blanched almonds
– 2/3 cup butter, softened
– 1/2 cup granulated sugar
– 1 tsp almond extract

1. Preheat oven to 350F.  Grease an 8-inch springform cake pan.

2. Cut the apples into slices about 1 cm thick.  Melt the 2 Tbs butter in a large pan over medium-low heat.  Add the granulated sugar and stir for about a minute while the sugar dissolves.  At the apples and cook, stirring constantly, until they are softened, about 10 minutes.  Remove from heat and let cool.

3. Mix together the flour and baking powder.  Put almonds in food processor and pulse until they are finely ground (but don’t turn them into almond butter!).  Clean and dry the food processor to make the batter.

4. Add remaining butter and sugar into the food processor and mix until fluffy.  Add eggs and almond extract.  Mix until well incorporated.  Add flour mixture and ground almonds.  Mix until batter is uniform.

5. Smooth mixture evenly in prepared pan and place apples on top.  Drizzle any extra juice from the apples on top of the cake.  Bake for 45-50 minutes.  Allow to cool before serving.